
Introduction
Digital image processing involves using a computer to analyze and modify images. This process includes reading an image, applying various techniques to alter or enhance it, and saving the final result. Image processing is crucial for applications handling user-uploaded content. For instance, web applications that allow users to upload images may face issues with oversized images, which can slow down load times and consume excessive server space. By resizing and compressing these images, you can significantly boost application performance and conserve server storage.
Node.js offers a variety of libraries for image processing, including sharp, jimp, and gm. This article will focus on the sharp library, a popular Node.js tool that supports multiple image formats like JPEG, PNG, GIF, WebP, AVIF, SVG, and TIFF.
In this tutorial, you’ll learn how to optimise images with sharp in Node.js. It includes how to read an image, extract metadata, resize, and change formats of images. You’ll also crop, grayscale, rotate, blur images, and add text to composite images. By the end of this tutorial, you’ll have a solid grasp of image processing in Node.js.
So, let’s start with it!
To process images with sharp, you must have the knowledge of:
- How to setup Node.js in your local development environment?
- Knowledge of how to write and run Node.js code.
- Basic understanding of asynchronous programming in JavaScript.
Once you’ve the understanding of these, it’s time to take step 1 for processing images.
Set up a Sharp Image Project
Before starting on your code, create a directory that will store the project files and images for the article. Open your terminal and use the mkdir command to create this directory.
The next step is to migrate to the new directory.
Once you’ve migrated to the new directory, it’s time to initialize npm.
Now, install sharp
Now, open the directory using your favorite IDE. In this tutorial, we’ll use VS Code.
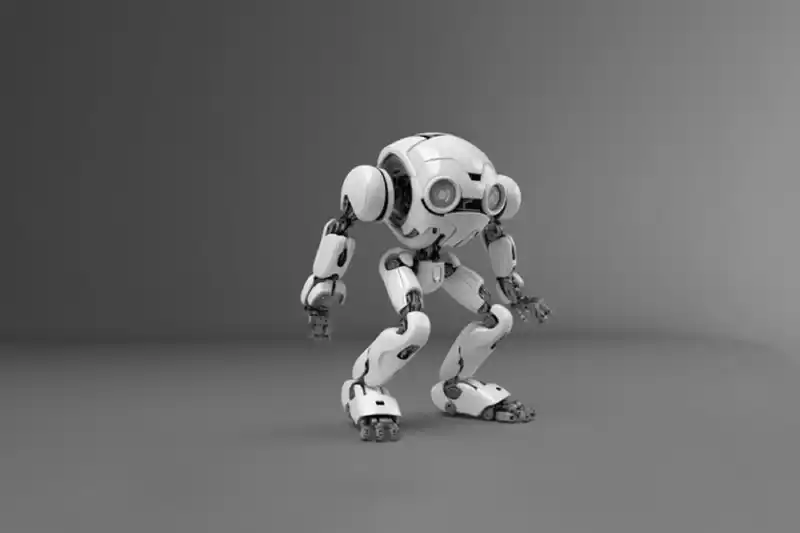
We’ll use the following two images:


Converting an image to grayscale
Create a new file in the editor terminal to convert your image to grayscale. You can do it via this command:
The next step is to copy the below code:
const sharp = require('sharp')

const convertTograyscale = () => {
  sharp('./images/robo.jpg')
  .grayscale() // or .greyscale()
  .toFile(__dirname + '/processed_images/grayscale_robo.jpg')
}

convertTograyscale()
In this example, we begin by initializing an instance of the sharp module. Using the require() function, we read the image path within the scope of the sharp() instance.
Next, we define the convertToGrayscale() function to handle the processing task. Within this function, we chain the grayscale() method from the sharp module to our instance, transforming the image to grayscale. Finally, we save the processed image in the processed_images folder using the toFile() method.
To execute the code, run the file in your terminal.
You can find the new created grayscale image named grayscale_robo.jpg in the processed_image folder.
Tinting an image
You can start tinting an image by creating a new file:
And then, you have to copy the below code:
const sharp = require('sharp')

  const tintImage = () => {
    sharp ('./images/robo.jpg')
    .tint({r: 255, g: 0, b: 0})
    .toFile(__dirname + '/processed_images/tint_robo.jpg')
  }

  tintImage()
We utilize the tint() method from the sharp module to modify the image’s color. This method allows us to set the intensity for the red, green, and blue chroma values. The intensity scale ranges from 0 to 255, with higher values producing a more vibrant and saturated tint. In this example, we set the red parameter (r) to its maximum value of 255 for a highly saturated red tint.
Save the file and then execute the following command to run the code:
Here’s your processed tinted image, tint_robo.jpg:

Extracting image metadata
Save the file and then execute the following command to run the code:
Next step is to copy the following code:
const sharp = require('sharp')

  const imageMetadata = () => {
    const metadata = sharp('./images/robo.jpg').metadata()

    console.log(metadata)
  }

  imageMetadata()
We use the metadata() function to retrieve information about the image. The extracted metadata is stored in a variable, which we then log to the terminal using console.log().
Next, execute the following command to run the code:
This will give you the following output:
{
    format: 'jpeg',
    width: 1920,
    height: 1080,
    space: 'srgb',
    channels: 3,
    depth: 'uchar',
    density: 72,
    chromaSubsampling: '4:2:0',
    isProgressive: false,
    hasProfile: false,
    hasAlpha: false,
    orientation: 1,
    exif: <Buffer 45 78 69 66 00 00 4d 4d 00 2a 00 00 00 08 00 05 01 12 00 03 00 00 00 01 00 01 00 00 01 1a 00 05 00 00 00 01 00 00 00 4a 01 1b 00 05 00 00 00 01 00 00 ... 88 more bytes>,
    iptc: <Buffer 50 68 6f 74 6f 73 68 6f 70 20 33 2e 30 00 38 42 49 4d 04 04 00 00 00 00 00 00 38 42 49 4d 04 25 00 00 00 00 00 10 d4 1d 8c d9 8f 00 b2 04 e9 80 09 98 ... 4 more bytes>
  }
Rotating an image
Start by creating a new file:
Now, use the following code:
const sharp = require('sharp');

const rotateImage = () => {
  sharp('./images/robo.jpg')
  .rotate(250)
  .toFile(__dirname + '/processed_images/rotate_robo.jpg')
}

rotateImage()
In this example, the rotateImage() function reads the image and rotates it by 250 degrees. Within the function, we chain the rotate() method from the sharp module, specifying the rotation angle. The rotated image is then saved as rotate_robo.jpg.
To execute the code, run the file:
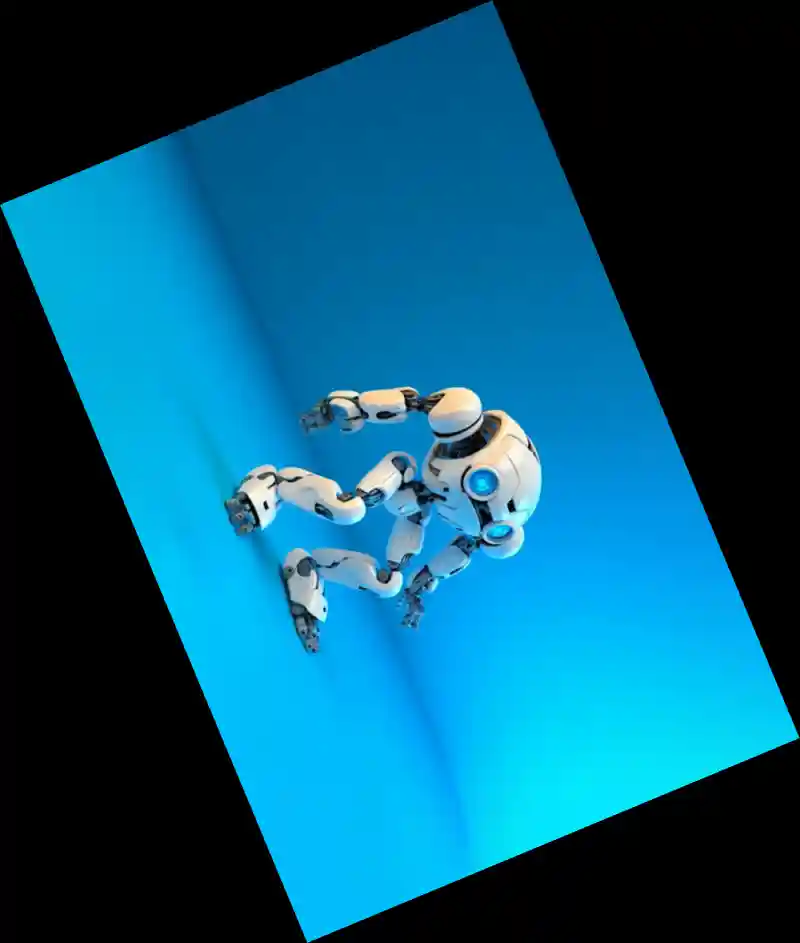
Here’s the rotated image:
Resizing an image
You can easily resize an image, but before that you need to create a new file.
Next is to copy the below code:
const sharp = require('sharp')

const resizeImage = () => {
  const resize = sharp('./images/robo.jpg')
  .resize(350, 260)
  .toFile(__dirname + '/processed_images/resize_robo.jpg')

  console.log(resize)
}

resizeImage()
To resize the image, we start by chaining the resize() function to the sharp instance. We then save the resized image in the processed_images folder. This method adjusts the dimensions without cropping or distorting the image.
Next, execute the following command to run the code:
This will give you the following output:
{
    format: 'jpeg',
    width: 350,
    height: 260,
    channels: 3,
    premultiplied: false,
    size: 12042
  }
Formatting an image
You can do it by:
const formatImage = () => {
    sharp('./images/robo.jpg')
    .toFormat('png', {palette: true})
    .toFile(__dirname + '/processed_images/format_robo.png')
  }

  formatImage()
To change the file format of the sharp instance from JPEG to PNG, we use the format() method. This method also allows us to compress the image by passing appropriate options.
Each formatImage() call accepts an object with various properties. For example, the palette property is only applicable to PNG images, the mozjpeg property is exclusive to JPEG images, and the lossless property is specific to WebP images. The compressed image is then saved in the processed_images folder using the toFile() method.
Cropping an image
Crop your image by starting with this:
Then copy the below command:
const sharp = require('sharp')

  const cropImage = () => {
    sharp('./images/robo.jpg')
    .extract({left: 740, width: 500, height: 300, top: 340})
    .toFile(__dirname + '/processed_images/crop_robo.png')
  }

  cropImage()
To crop the image, we start by chaining the extract() function to the sharp instance. We then save the cropped image in the processed_images folder. This procedure allows us to specify the following parameters: the horizontal space to be cropped from the left edge of the image (left), the desired width of the image (width), the desired height of the image (height), and the vertical space to be cropped from the top of the image (top).
In this example, we define a cropping box that is 500px wide and 300px high, positioned 740px from the left edge and 340px from the top edge of the image. Using the extract method, any part of the image within this box will be retained, while everything outside the box will be removed.
Now, copy the following code:
Here’s your copped image

Create a composite image
You can easily create a composite image i.e., combine two or more images to create a single image. However, for that you need to first create a new file:
After you’ve created a new file, copy the following code:
const sharp = require('sharp')

  const compositeImage = () => {
    sharp ('./images/fall.jpg')
    .composite([{input: './images/robo.jpg', left: 900, top: 750}])
    .toFile(__dirname + '/processed_images/composite_robo.jpg')
  }

  compositeImage()
To create a composite image, start by chaining the composite() function to the sharp instance. We also add a new image file, fall.jpg, to the sharp module. In this example, fall.jpg serves as the background image.
The composite() method of the sharp module takes an array as input. The image to be composited, robo.jpg, is represented by a single object within the array. It’s important that the composite image has smaller dimensions than the background image. The object attributes you can specify include:
- input: the image to be placed over the background image
- top: the vertical position of the composite image
- left: the horizontal position of the composite image
Save the resulting image, and then run the following command:
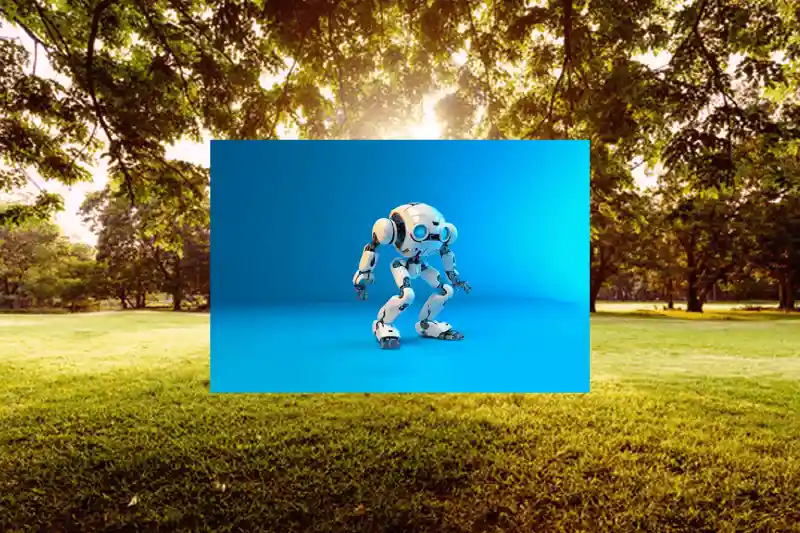
Here’s the composite image:
Blur an image
If you want to blur an image, do this:
Next, add the code mentioned below:
const sharp = require('sharp')

  const blurImage = () => {
    sharp('./images/robo.jpg')
    .blur(9)
    .toFile(__dirname + '/processed_images/blur_robo.jpg')
  }

  blurImage()
In this example, we utilize the blur() method from the sharp module to apply a Gaussian blur to the image. This technique uses the Gaussian function to reduce the weight of the pixels at the edges, leading to decreased image detail and noise. For this example, we set the Gaussian blur() sigma to 9.
Save the file, and then execute the following command:
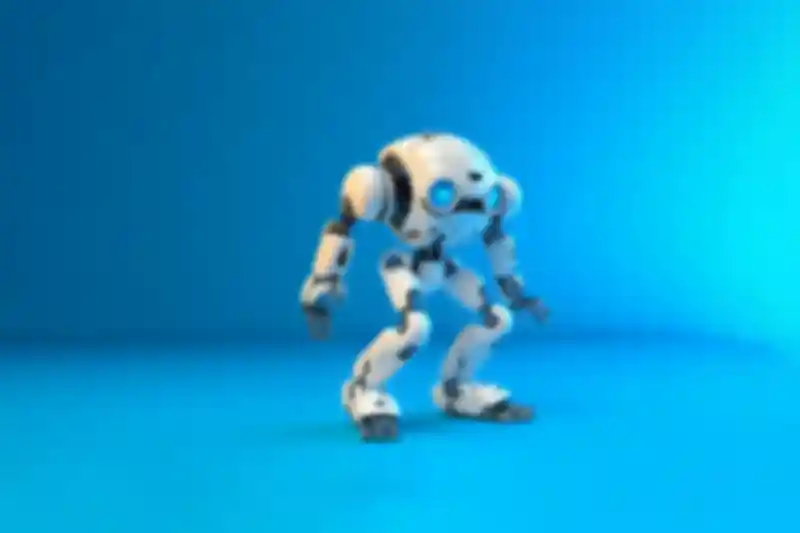
Here’s your blurry image:
Sharpening an image
Run this command to create a new file:
Next, add the following code:
const sharp = require('sharp')

  const sharpenImage = () => {
    sharp ('./images/robo.jpg')
    .sharpen(13)
    .toFile(__dirname + '/processed_images/sharpen_robo.jpg')
  }

  sharpenImage()
To sharpen the image, we use the sharpen() function. Without any parameters, this function provides a quick, moderately sharpened result. When parameters are specified, it performs a slower but more precise sharpening. In this example, we set the sharpen() sigma to 13.
Now, copy the following code:
Here’s your final sharpened image:
Here’s your blurry image:

Flipping an image
To horizontally reverse or flip an image, you can start by creating a new file:
Then copy this code:
const sharp = require('sharp')
const flipImage = async () => {
  await sharp('./images/robo.jpg')
  .flip()
  .toFile(__dirname + '/processed_images/flip_robo.jpg');
}
flipImage()
We use the flip() method with the sharp instance to invert the image along the x-axis.
Next, run the following program:
Here’s the flipped image:

Flopping an image
Start with creating a new file to vertically reverse or flop your image
Next, type the following code:
const sharp = require('sharp')
  const flopImage = async () => {
    await sharp('./images/robo.jpg')
    .flop()
    .toFile(__dirname + '/processed_images/flop_robo.jpg');
  }
  flopImage()
To flop the image over y-axis, we chain the flop() method to the sharp instance.
Now, run this command:
To get your flopped image.

Adding text to an image
Till now, sharp doesn’t have a feature/method to add text over an image. However, we can do it by drawing text using SVG. Then, you can use the composite() method to add text over your original image.
For this, start with creating a new file, using command:
sharp does not currently have a method for adding text to an image. However, as a workaround, we can draw text using SVG and then use the composite() method to add the text image to the original image.
Then use this code:
const sharp = require('sharp');

const addText = () => {
  const width = 900;
  const height = 500;
  const text = "E.T, go home";

  const svgText = `
  <svg width="${width}" height="${height}">
    <style>
      .title { fill: red; font-size: 85px}
    </style>
    <text x="45%" y="40%" text-anchor="middle" class="title">${text}</text>
  </svg>`

  const svgBuffer = Buffer.from(svgText);

  sharp ('./images/robo.jpg')
  .composite([{input: svgBuffer, left: 1150, top: 90}])
  .toFile(__dirname + '/processed_images/text_robo.jpg')
}

addText()
For our workaround, we utilize an addText() function that accepts four parameters: the target text area width, the target text area height, the text string to be rendered using SVG (in this case, “E.T, go home”), and a transparent container called svgText to hold the text.
The SVG element comprises two child elements: style and text. The style element employs CSS to modify the text’s appearance, adjusting properties like fill for color and font-size for text size.
The text element is characterized by four attributes: horizontal position (x), vertical position (y), alignment (text-anchor), and class. The class attribute determines how the CSS styles are applied to the text element. The ${text} interpolation inserts the string “E.T, go home” from the text variable.
We then create a Buffer object from the svgText variable using the Buffer.from() function and store it in the svgBuffer variable.
To incorporate the text into the image, we chain the composite() function to the sharp instance, utilizing the svgText variable as input. In this example, “robo.jpg” serves as the processed (or background) image.
Now, execute the following command:
For our workaround, we use an addText() function with four variables: the desired text area width, the desired text area height, the text string that will be drawn using SVG (in this example, E.T, go home), and a transparent container, svgText, that will hold the text.
The SVG element has two child elements: style and text. The style element uses CSS to alter the appearance of the text. The fill and font-size properties modify the color and the size of the text, respectively.
The text element has four attributes: horizontal position (x), vertical position (y), alignment (text-anchor), and class. This last attribute, class, specifies how the CSS styles should be applied to the text element. ${text} interpolates the string E.T, go home from the variable text.
Next, we use the Buffer.from() function to create a Buffer object from the svgText variable and then store it in the svgBuffer variable.
To add the text to the image, we chain the composite() function to the sharp instance and use the svgText variable as the input. In this example, robo.jpg is the processed image (or background image).
Now, run the following command:
Here’s the image with text:

Storing the image in a database
If you want to store your processed images in database, you can carry out this operation in two ways:
- 1. Using JavaScript Promises
- 2. Using the async/await syntax
However, running the operations, make sure to create a new file named touch_database.js.
#1. Using JavaScript Promises
A Promise is an object that signifies the completion or failure of an asynchronous operation and the resulting value. sharp returns a Promise, allowing us to execute actions once the image processing is finished.
const sharp = require('sharp')

const usingPromise = () => {
  sharp('./images/robo.jpg')
  .extract({left: 740, width: 500, height: 300, top: 340})
  .then(() => {


    // Write code to store the image to the database


  })
  .catch((err) => console.warn(err));
}

usingPromise()
Promises offer two methods for handling their results. A successful outcome is managed using the .then() method. In this example, once the image is successfully processed, the .then() method runs the code to save the image to the database. If the image processing fails, the error is handled by the .catch() method.
#2. Using the async/await syntax
The async keyword simplifies handling asynchronous, Promise-based code, making it look and act more like synchronous code.
const usingAsync = async() => {
  try{
    const image = await sharp('./images/robo.jpg')
    .extract({left: 740, width: 500, height: 300, top: 340})
    .toFile(__dirname + '/processed_images/crop_robo.png')

    // Write code to store image to the database

    return image

  }catch(e){
     // handles error if any
  }
}
usingAsync()
Within an async function, a try…catch block is employed to manage errors. The await keyword is used before a function call that returns a Promise.
Conclusion
In this tutorial, we have explored how to process images in Node.js using the sharp library. We applied various methods such as grayscale(), tint(), rotate(), resize(), crop(), blur(), sharpen(), flip(), and flop() to modify the image’s appearance, style, and dimensions. We retrieved the image metadata using the metadata() method and merged two images with the composite() method. Additionally, we employed the composite() method to overlay text on the image using an SVG-based approach. Finally, we used the format() method to convert the image type and compress it.
If you need any assistance in process images with sharp in Node.js, you can contact website development agency in the UK today!